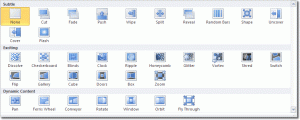
Slide transitions in PowerPoint guide the viewer from one slide to the next and are used to make a presentation more engaging. You can control the speed, add sound, and also customise the properties of transition effects. There is a whole tab in the ribbon devoted to transitions (it’s called… Transitions!) but by far the most interesting group on this tab is the Transitions to This Slide group. This group contains the gallery of all transitions available to us.

If you hover over the thumbnail of any transition, you can see a live preview of it without having to apply it. Pay attention to the slide you have selected when you add a transition. The transition is applied on entry to the selected slide only. It doesn’t affect any other slides. So if there are 10 slides in your presentation and you add a transition while slide 6 is selected, the transition appears when you move from slide 5 to slide 6.
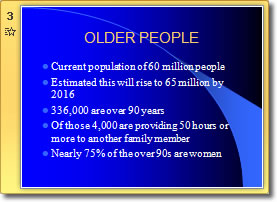
You can easily spot the slides that have transitions to them because they display a “whooshing” star symbol in the top left hand corner in the slide panel of Normal View. This symbol is also displayed in Slide Sorter View, beneath the slide.

Transition Quick Notes
- Removing a transition is as simple as selecting the slide and then clicking on None in the Transition to This Slide group.
- If you want to apply a transition to all slides in the presentation, click Transitions > Timing > Apply To All.
Changing A Transition’s Properties
The transitions tab allows us to change the following transition properties:
- Effect Options – from which direction the transitions occurs.
- Sound – there is a variety of sounds that can be added to the transition, including applause, bomb and cash register. Be careful! Inappropriate use of noises can jar and alienate the viewer. The last thing you want is a disengaged audience.
- Duration – use this value to adjust how long the transition takes to complete.
- Apply To All – apply the transition to all slides. When you add a transition, it initially applies to just the selected slide.
- Advance Slide – you can select what action triggers the transition to the next slide. If you select On Mouse Click, the presentation waits on the current slide until you click the mouse, and then the presentation progresses to the next slide. Alternatively, you can select a “time to wait” by checking the After box and adjusting the time value. The presentation will pause on the selected slide for that amount of time before automatically moving on.

