Using tables is a great way to set out information in your PowerPoint presentation. In addition to presenting tabular data, tables are often used for laying out a slide. Once you have removed the borders and shading from the table and cells, the audience will never know that there is a table there.
There are a few ways of inserting a table in your presentation:
- Click on the table icon on a content palette.
- Use the Insert tab in the ribbon.
Using the content palette is probably the easiest method. Content palettes are found on slides of the following types:
- Title and Content
- Two Content
- Comparison
- Content with Caption
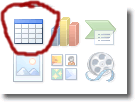
When adding any of these kinds of slides, you will see a group of icons in the centre, like this:

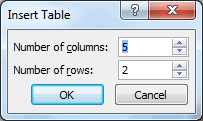
The table icon is circled in the image above. If you click on that icon, the Insert Table window will open. You can use this to specify how many columns and rows you want your table to have. Click OK when you’ve made you selections and the table will be inserted.

The style of the table entered fits the theme that the presentation is using. Here is how the table I just inserted looks:

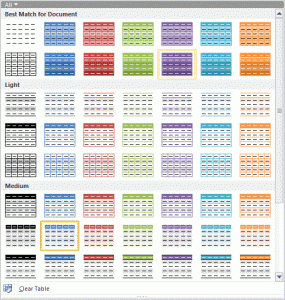
You can easily change the style of the table by making sure the table is selected (it should be if you just inserted it!) and then when you are on the Table Tools tab, select the Design sub-tab and click Table Styles > More (the down arrow in the bottom right). A gallery of all the table styles used by the current theme opens.

This gallery provides a live preview, so you can hover over a thumbnail image to see what that style would look like when applied to your table. To apply a style, just click on an image.
At the moment, we just have a header row and a body row in our table. We can easily change that. Navigating within this table is just the same as navigating within a table in Microsoft Word. To move to the next cell you can press the tab key. To go back a cell, press shift-tab. If the cursor is in the last cell of a row, pressing tab will take you to the first cell of the next row. If that is the last cell of the last row, pressing the tab key will create a new row.
Using Tables For Layout In PowerPoint
There are a lot of impressive features in PowerPoint 2010 that can help you set out your information very effectively. In addition to those, you can also use a table to layout your slide. We’ll look at a simple example here.
Suppose you want to display a bulleted list in two columns. One way of doing this is to insert a table with two columns, and put half the list in one column and the other half in the other column. You can follow the instructions above to insert a two column table.
Immediately, you notice that the table has a header, and we don’t need one of those. We can remove it by navigating to the Design tab within Table Tools, and making sure that the Header Row box is unchecked in the Table Style Options group.

As we’ll discover later, this step isn’t strictly necessary, but it’s a good idea to become familiar with all the functionality relating to tables in PowerPoint. From here, there are two ways to go. You can either insert half the bulleted list into one cell in the first column and the other half in one cell in the second column, or you can use a different row for each item. For quickness, we’ll use only one cell for each half of the list. We end up with this:

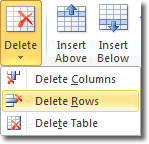
If you want to resize the table, you can drag the column separators. Don’t worry about the last empty row, as we’ll get rid of that now. Place the cursor in a cell on the last row and then click the Layout tab > Rows & Columns > Delete > Delete Rows.

The unneeded row is now gone. What we should do now is remove the cell and table borders so that the audience doesn’t know there is a table there. Make sure the cursor is in a cell in the table and click on Layout Tab > Select > Select Table, and then click the Design Tab > Table Styles > Borders (the down arrow to the right) > No Border. This will remove all borders on your table and cells. We can get rid of the shading too, by clicking Shading > No Fill.

