Sound and music can make a big difference to the delivery of your PowerPoint presentation to your audience. It can make the impact more dramatic and enhance your message – if used wisely. As with animations, you should not overwhelm your audience with sound! Use only where it will help to get your message across. You can use music and sounds in the following ways:
- insert a sound file onto a slide. The sound then plays when a trigger occurs such as the sound icon being clicked or the slide being shown.
- associate a sound with an object. Similar to above, the sound will play when the object is clicked, or something else happens to the object. You can use objects like pictures or charts here.
- associate a sound with an animation effect. The sound will play when the animation happens.
- associate a sound with a slide transition. The sound will play when the next slide appears.
- add a music file that plays continuously in the background, like the soundtrack to a movie.
Sound in PowerPoint is a big subject, so we’ve split this tutorial up into 5 sections. The first section – how to insert a sound file as an object – is here. Use the links at the bottom to jump to the other sections.
Insert A Sound File As An Object
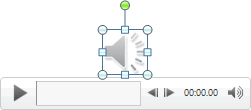
When inserting a sound file as an object, you will see an audio icon that displays controls for playing, pausing and rewinding. There are two sources of sound file you can use: those on your computer’s hard drive and those in Clip Art. Let’s look at Clip Art sounds first.
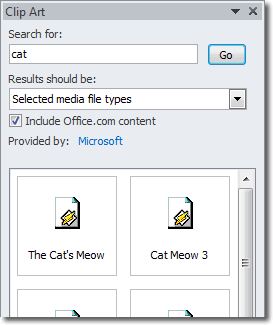
Open up the Clip Art panel by clicking Insert > Clip Art (in the Images group). The Clip Art panel should appear to the right. As we are interested in sounds and music, change the Results should be drop down selector to be Audio. Type in something to search for and click Go.

If you want to preview what the file sounds like, right click on it in the Clip Art panel and select Preview/Properties. If you left click on a sound file, that will add it to your slide. When you have a sound file on your slide, you will see the sound icon.

When selected, the icon displays some playback controls beneath it that let you play the sound and rewind it. You can actually hide this icon by checking the Hide During Show box in the Audio Options group on the Playback tab. Some people even drag the icon off the slide so that it’s hidden. The choice is yours.
To delete the sound file from the slide, select it and press the delete key.
To insert a sound file that exists on your computer’s hard drive, click Insert > Audio (in the Media group). Navigate to where the file exists on your hard drive, select it and then click Insert. The same sound icon, together with the same playback controls are displayed on the slide.

