The presence of images in your PowerPoint presentation can help to capture the attention of the members of your audience and to engage them. To insert an image into your presentation in PowerPoint 2010, first of all select the slide you want the image to appear on. Then click Insert > Images > Picture. When the Insert Picture dialogue box opens, navigate to the location of the image on your hard drive, select it and click Insert.
The image is inserted onto the slide and because it is selected, the Picture Tools contextual tab appears in the ribbon. There are several snazzy things you can do to manipulate the image immediately, such as:
- reposition the image on the slide using the arrow keys.
- scale the image up or down by holding down shift while you press the arrow keys. The up arrow and right arrow keys make the image bigger, whilst the left arrow and down arrows make the image smaller.
- rotate the image by hovering over the round green handle at the top of the image – then click and drag left or right.
- resize the image by clicking and dragging on the resize handles at the corners of the image and halfway along each edge. Dragging on the corner handles maintains the proportions of the image, while dragging the handles along the edges will “squash” the image.
The Picture Tools Tab
The Picture Tools tab offers many options for manipulating images. The best thing to do is experiment with each one, knowing that if you mess up, you can easily press ctrl-z to undo your changes.
Let’s go through a quick example of how you can add some stunning effects to an image you’ve added to your presentation.
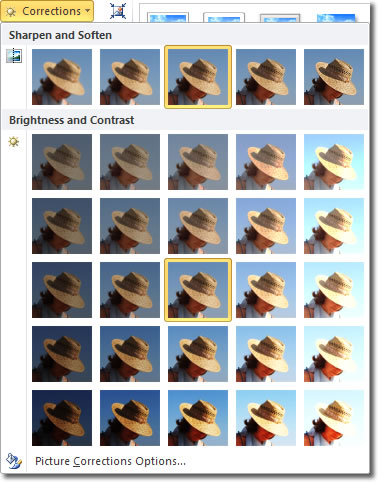
With the image selected, make sure you’re working in the Picture Tools tab. Suppose your image is too dark and you want to brighten it up. Click Adjust > Corrections and hover over the thumbnail images in the Brightness and Contrast section.

Each time you hover over a thumbnail image, the effects are tenporarily applied to your image. This is called a Live Preview. Select the brightness/contrast settings that work best.
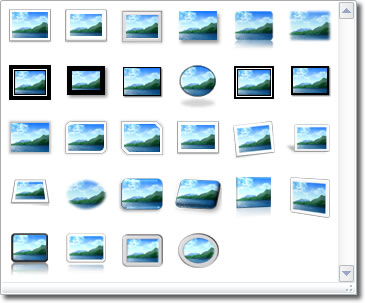
Now, let’s give the image some perspective and a small shadow. Click the more button (the dialogue box launcher) at the bottom right of the Picture Styles group.

Again, live previews are available when you hover over the thumbnails. Pick the one that shows a perspective shot with a shadow (the first thumbnail on the second row from the bottom).

