One of the new features of PowerPoint 2010 is the ability to convert powerpoint to video. Microsoft make it so easy to do this conversion that no technical prowess is required. It’s simply a case of clicking a few buttons.
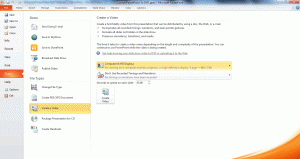
Open the PowerPoint presentation you want to convert to video and then click the File tab > Share > Create a Video. The following window opens:

The first setting you can change relates to the intended viewing destination of your video, and you have the following options:
- Computer and High Definition Displays
- Internet and DVD
- Portable Devices
These settings relate to the size of the video produced – not the format. You might think that they give you the ability to change the format to be .wmv, .mov, .flv etc. but that’s not the case. The only video format you can export to is .wmv. What a limitation!
The next setting controls whether the exported video uses recorded timings and narrations. Most presentations don’t use recorded timings and narrations, but if yours does, then amend this setting to an appropriate value.
The next setting affects how much time is spent on each slide of your presentation.
Once you’ve amended the settings, click Create Video. The Save As dialogue box opens and you can use this to name the video and find a location on your hard drive to save it. The name of the presentation defaults into the name of the video you are converting to, but of course you can change this. The Save as type defaults to Windows Media Video (.wmv) and unfortunately there are no other formats available.
When you click Save, the video conversion process starts and you can see a progress bar at the bottom of the workspace.

To the right of the progress bar is a round cancel button that you can use to abort the conversion.
When your presentation has been converted, you can double click on the video file to play it in your default video player.

