Often in your worksheets, you’ll need a title or heading to span multiple cells and you’ll want Excel to display the title or heading in the center. This is where Excel’s merge and center command comes in.
For example, look at the following spreadsheet that contains data about sales by month for the year 2010.
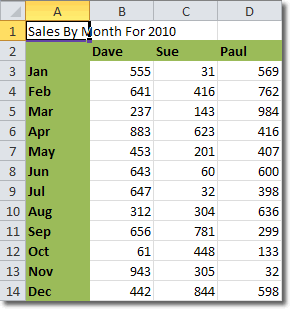
When we type the title “Sales By Month For 2010?, we can see that it spills out into other cells. It would help if we could merge all the cells above the table headings for the title to occupy and also center the title. We can do that with just one button: the Merge and Center button.
Select cells A1 to D1 and then click Home > Alignment > Merge and Center. Cells are merged and title centered! Press Cctrl-b to bold the text and there we have a nice looking title.
Merge And Center Vertically
We can do a similar thing vertically for row headings. Suppose we move our table to the right by one cell to make room for a row title.
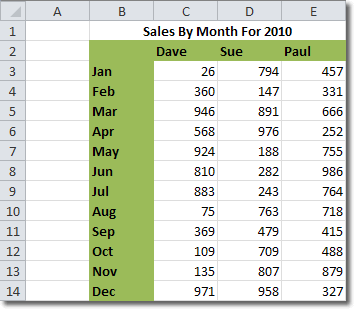
Now, we can type the text “Months of the year – 2010? in row A14. The text needs to be in the bottom row because we’re going to rotate the text anticlockwise, as we’ll see.
Select cells A2 – A14 and then click the Merge and Center button. Those cells are merged, but we can’t see all the text. Now click the Orientation button, also in the Alignment group.

Select Rotate Up, and we should get the following:
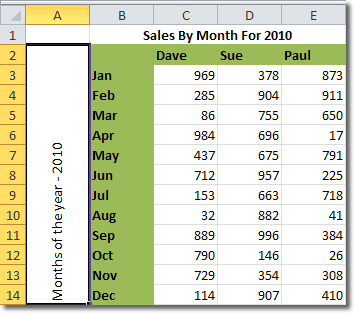
Hold on, we selected Merge and Center, but the text isn’t centered. What’s wrong? Well, the text is centered – horizontally. It needs to be centered vertically, so we need to click the Middle Align button in the Alignment group.

This does the trick, so all that’s left to do is press ctrl-b to bold the text.

