Planet For Application Life Development Presents
MY IT World

Explore and uptodate your technology skills...

Content
Powerpoint - Add A Sound File To An Object
Powerpoint - Add Sound
Powerpoint - Animation Painter
Powerpoint - Animations
Powerpoint - Artistic Effects
PowerPoint - Backgrounds
Powerpoint - Backstage View
Powerpoint - Bokeh Backgrounds
Powerpoint - Charts
Powerpoint - Compress A Presentation
Powerpoint - Convert Video
Powerpoint - Convert Video Using Camtasia
PowerPoint - Converting Text To SmartArt
Powerpoint - Create A Quiz
PowerPoint - Create A Speech Bubble
PowerPoint - Create A Template
PowerPoint - Create A Theme
PowerPoint - Create Animated Backgrounds
PowerPoint - Creating Shapes
PowerPoint - Curved Text
Powerpoint - Developer Tab
PowerPoint - Embed Your Website
PowerPoint - Embed Videos From Your Hard Drive
PowerPoint - Embed Youtube Videos
PowerPoint - Extract The Background Image
PowerPoint - Formatting Video
Powerpoint - Handouts
PowerPoint - Hyperlink
PowerPoint - Insert A Table
PowerPoint - Insert An Excel Spreadsheet
PowerPoint - Insert Images
PowerPoint - Key Tips
PowerPoint - Make Sound Start Automatically
PowerPoint - Notes
PowerPoint - Open PPT Or PPTX Files
PowerPoint - Paste
PowerPoint - Calendars
PowerPoint - Transparent Text
PowerPoint - Viewer
PowerPoint - Presentation Views
PowerPoint - Remove The Background From An Image
PowerPoint - Rotating Text
PowerPoint - Save As PDF
PowerPoint - Selections
PowerPoint - Shapes
PowerPoint - Slide Layouts
PowerPoint - Slide Transitions
PowerPoint - Speech Bubbles
PowerPoint - Template
PowerPoint - The Ribbon
PowerPoint - Themes
PowerPoint - Clip Art
PowerPoint - Venn Diagram Template
PowerPoint - Video
PowerPoint - What Makes A Good PowerPoint Presentation
PowerPoint - WordArt

PowerPoint - Create A Speech Bubble

PowerPoint 2010 comes with a ready made speech bubble that you can quickly and easily insert into your presentation. Go to the Insert tab and click Shapes (in the Illustrations group) > Oval Callout. The shapes aren’t actually named in the gallery that is displayed, but if you hover over each one a tooltip will tell you what it’s called. The Oval Callout shape looks like the image below.
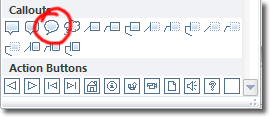
Oval Callout

When you click on the Oval Callout shape, it activates the tool and you then have to drag the shape out on the slide. Usually the bottom pointy bit is a bit too short for my liking. Fortunately, you can click and drag on the lower diamond shaped handle. This will lengthen or shorten just that portion of the speech bubble.
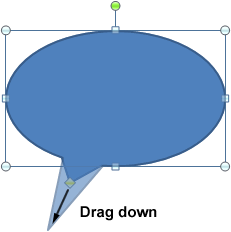
Drag Handle

This speech bubble is fine for a bog standard shape that is quick and easy to insert. However, we’re going to spice it up by making that bottom section curved. We want our speech bubble to look like the one below, and to achieve this end result, we need to learn how to manipulate shapes.

Curved Speech Bubble In PowerPoint

The first thing we need to do is select our oval callout. When we do, the Drawing Tools tab appears in the ribbon: go to the Format tab. Click Edit Shape > Edit Points, and drag handles will appear on the callout, as shown below:
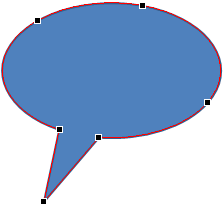
Edit Points

We’re going to curve the bottom pointy bit, so select the bottom point by clicking on it. When the point is selected, you should see two yellow drag handles. Clicking these will make the line leaving the point curved. Have a go and experiment to get a feel for how those drag handles work. You should find that dragging these handles upwards and right will give you something like the image below:
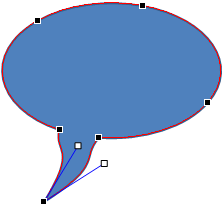
Speech Bubble In The Making

It’s looking better, but the curves could do with being tidied up where they join the oval bit of the speech bubble. We can clean things up by selecting those points and manipulating the curve like we’ve just done with the bottom point.

The finished article:
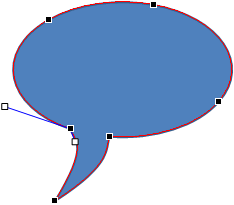
Tidying Up The Speech Bubble